Forcing Paperwhites for Indoor Bloom -Updated!
Nothing is sweeter than the fresh look and sweet scent of a bowl of Paperwhites blooming indoors in the dead of winter. But, now is the time to plant if you want to have that exciting experience!
Start by purchasing the largest bulbs you can find. I got mine online from www.easytogrowbulbs.com. I could not find any large bulbs locally and the smaller bulbs produce….wait for it….smaller plants and flowers. Since I’m going for a nice big centerpiece look I don’t want to waste time and money on a small weak plant (which I’ve done many times in the past!).
See the difference:
The smaller bulbs are fine for scattering throughout the yard where they can grow over time. If you’re forcing a bulb indoors you want the the biggest, brightest flower tucked inside that little (I mean big) brown gem. Since the work has been done and next year’s flower is already inside waiting to burst forth, you can see why bulb size matters! If you mail order (I could only very small bulbs locally) they will come safely packaged and ready to plant.
So, how do you treat your bulbs so that you encourage the flowers to burst forth?
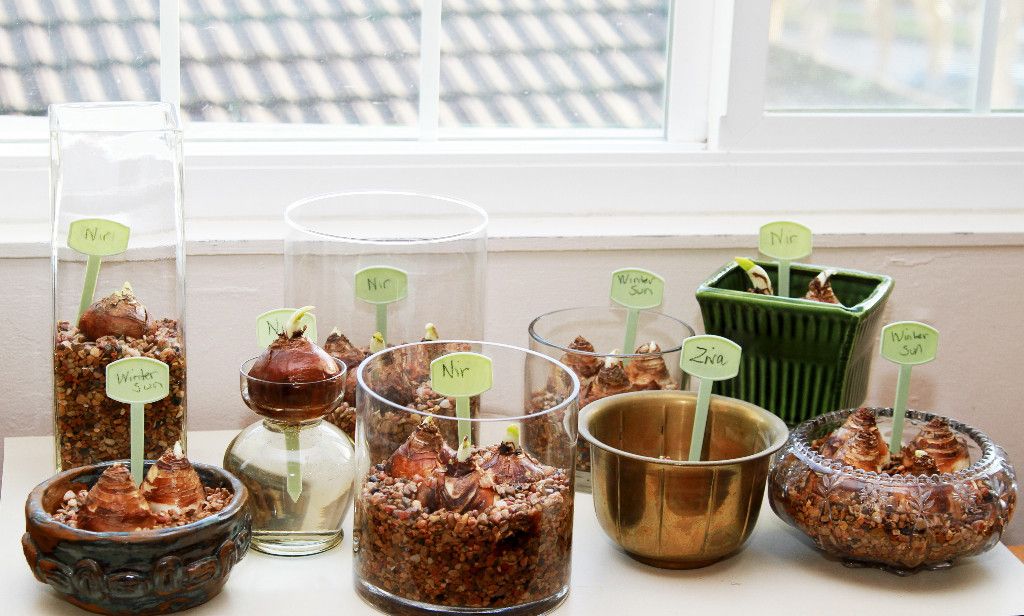
1. After purchasing nice large bulbs, select a container that will not leak. If you pick a ceramic container make certain the entire inside is glazed, especially if the bottom is not. I have ruined tables by missing that little point! (I find glass easiest to use because I can tell exactly how much water to add – thrift stores are a great source for inexpensive containers).
2. Fill the container a few inches (I use 2-4″) with gravel or pebbles. I found bags of smooth shiny pebbles that looked nice but the cost was way too high for a project of more than one container. Aquarium gravel, purchased at Walmart was the lowest price and most natural look I found. (Not than you can’t use red or blue or glass beads…I was just going for the natural look). 

3. Set the bulbs, flat side down, on top of the gravel. Do not “screw” the bulb down into the gravel or you may damage the basal plate where you want those nice little roots to grow. Instead, gently pour a little more gravel around the bulbs to anchor them in the bowls.
4. Add water just up to the bottom of the bulb. Don’t cover the bulb or even add water part way up the side-you don’t want it to rot instead of bloom. Check daily and add fresh water to keep the bottom of the bulb just sitting in the water. Within a week or so you should begin to see plump, white roots forming and growing down into the gravel where they will anchor your plant. Next the plant will grow and spring forth with the leaves and flowers that formed inside last year!
 5. Set the bowl of bulbs in a bright, sunny spot. Too little light will cause them to become spindly, weak and floppy…not a good look. While larger bulbs are the best way to get nice large plants, even a great bulb will produce thin, floppy plants without proper light. (Since mine were just planted I thought I’d tempt you with the beautiful picture that came with my bulb order…see what’s coming!)
6. If you like to experiment (I do!) you might want to try to encourage shorter, more compact plants by using a little secret known to florists and big growers: Alcohol water! After the first week in water you can replace the plain water with water and alcohol. It has to be done at a precise dilution and you can read exactly how to do this here. I will be trying it with these bulbs and reporting back in the next weeks and months as my experiment plays out so check back for updates!
(A big thank you to easytogrowbulbs.com for supplying the bulbs and the knowledge for this alcohol experiment. I’ve ordered from them in the past and they supply healthy big bulbs and share a wealth of growing information on their site. Stop by for a visit here.)
UPDATE: November 22, 2014
Wow! Alcohol works! The paperwhites were planted on October 25. Here are the bulbs on Nov. 6:
And November 15:
They were blooming well by November 22 and you can really tell that the bulbs planted in gravel with 10 parts water and one part rubbing Alcohol were shorter and sturdier than those in plain water. See: (left had alcohol, right had water)
I actually ended up tying the flowers on the biggest water only “Nir” bulbs because they got so tall and flopped over while the same “Nir” bulbs in alcohol water were shorter with very sturdy stems!
This photo shows the difference between two “Nir” plants more clearly:
The “Nir” are all blooming and the Winter sun are just getting ready to bloom. The fragrance drifts through my office and down the stairs….it’s wonderful! From now on I will always use the technique found on the “Easy to Grow Bulbs” site. One week in plain water and then 10 to 1 water and alcohol mix for beautiful, well proportioned plants that stand tall but don’t need to be staked and don’t flop over just went you want to display them. Mine will be in full bloom just in time for our Thanksgiving table! The blooms are just beautiful….

